Numbers

Yesterday, a fellow driver asked me where I bought the numbers on my car.


On my white Fiesta, I've been using numbers cut out of black magnetic material that I purchased in a big roll. Well, that doesn't show up too well on my black 944.  But the silver paw vinyl does...
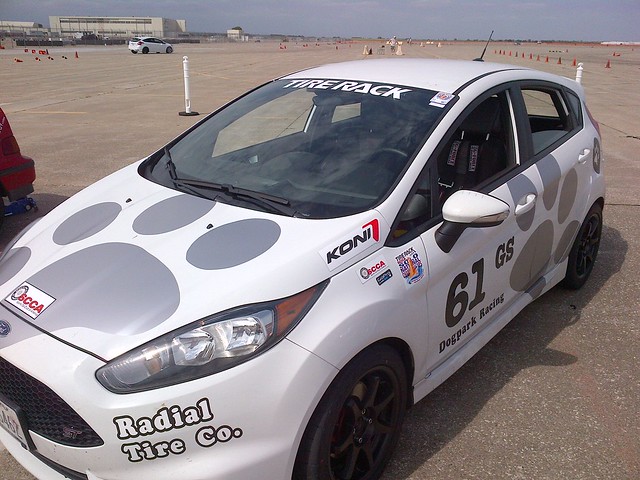
IMG-20140903-00678

So last year I used some of the silver "repositionable adhesive vinyl" left over on the roll from the dogpark livery. I've been cutting out different fonts for each event. My last event was kind of art-deco:

At the VIR event I did a futuristic, hastily done font:
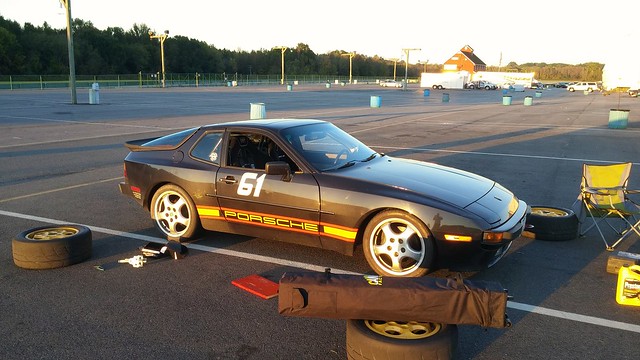
2015-10-15_08-20-09

At my first event I used the Porsche font which might have been used for the numbers "911" and "GT3":
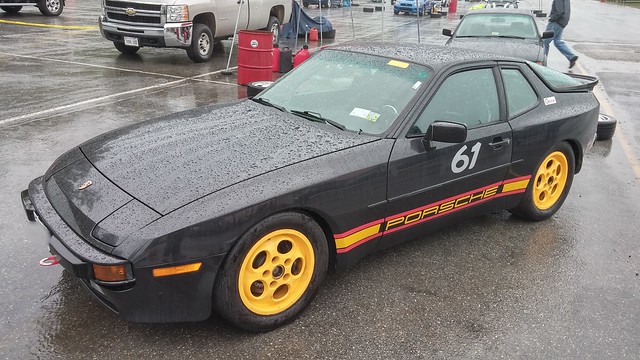
20150912_084858_HDR

This year I bought some golden yellow vinyl which matches the yellow track wheels I have. This font is called "Clockwork Orange".
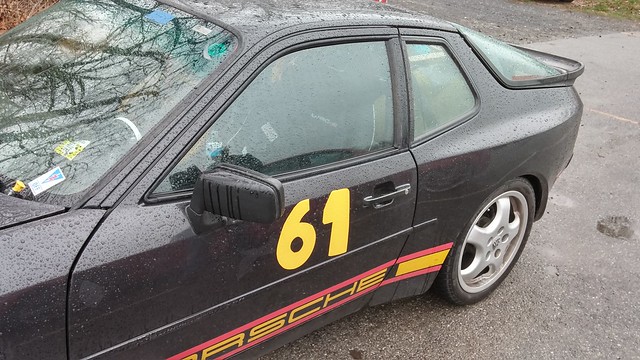
20160313_155050_HDR

Numbers are so simple to make, I don't know why more people don't make them. They certainly look cooler than painter's tape, and they don't cost much more. Here are links to the products I picked up on Amazon:

It's really simple to pick a font, and print out each number as big as it will be printed on an 8 1/2 x 11 sheet. Transfer the outline to the vinyl either by scribbling the back side with pencil or by using extra pressure to make an imprint on the vinyl. Then just cut it out.

It's actually one of the more fun and relaxing things I do to prepare for a track weekend, particularly if I'm not rushed.

Make a Carrying Case for your Stuff!

Hey everyone.

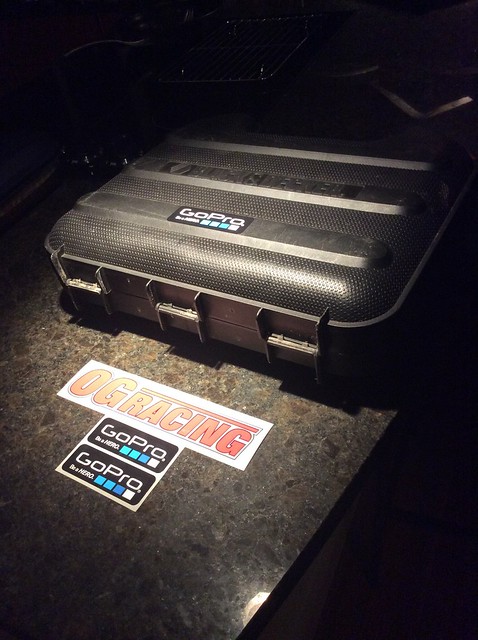
I just picked up a GoPro Hero 4 Black from OG Racing with the discount they've offered to Rennlist folks:

http://rennlist.com/forums/racing-an...a-blowout.html

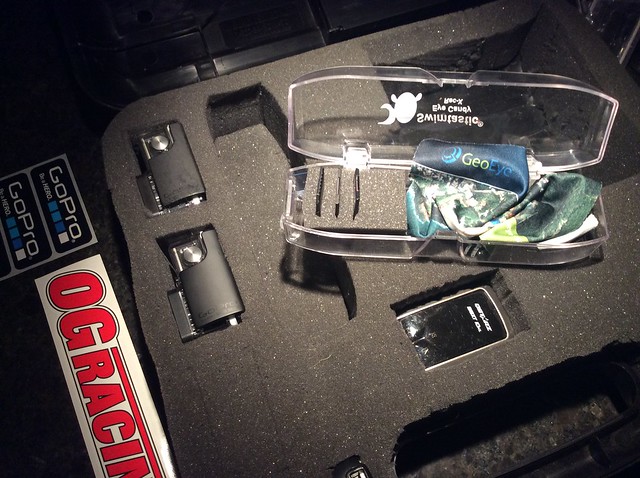
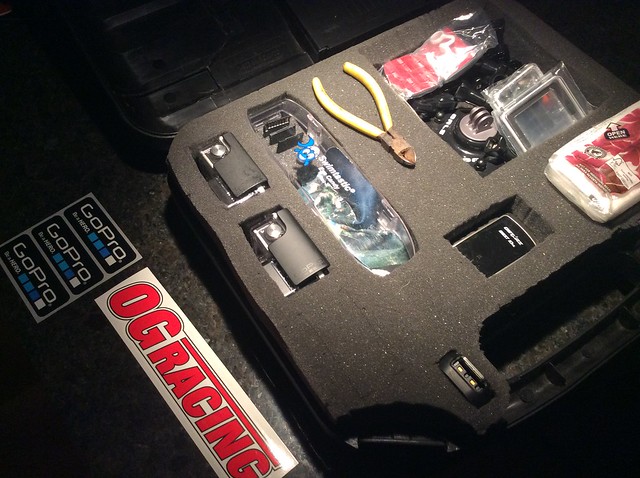
And I thought I'd share the carrying case I made to take my camera gear to the track and to stay organized.

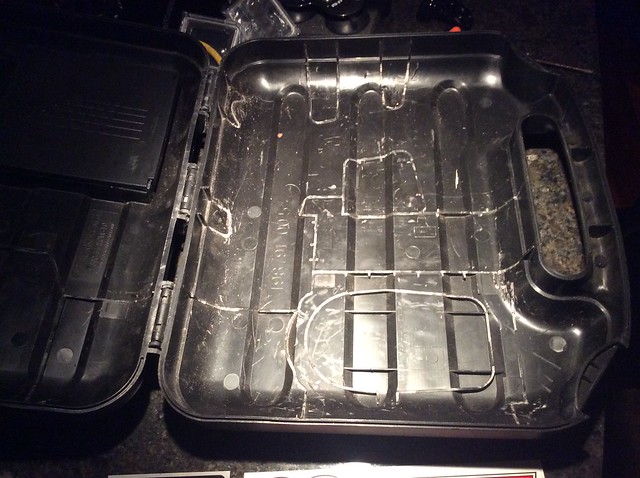
First I took a case from an old cordless drill that my brother was about to throw out, and I cut out all the separators and support fins with a wood chisel (could have used a dremel, it's tough stuff though).

Untitled


Then I took some packaging foam from a big server crate and cut it to fit. I cut holes all the way through for everything with a sharp knife, and cut a slice of each of the cut-out pieces to line the bottom of each hole.

Untitled

The swim goggles case is great for keeping track of really small stuff like media.

As you can see, I've cut a new hole for my new camera, right next to my original GoPro 3+ Black edition. I also carry my gps receiver, gopro remote (came with my first cam), and a couple tools including a stubby philips for tightening the mounts.

You can also tell that I could add at least four more gopros, but I'd probably have to make another case just for all the mounting stuff at that point. I'd also have to take out a second mortgage, and at some point I'd have to admit to myself that I'm not Ken Block.  <-- that's a youtube video about a pro gopro production worth checking out...

Untitled

I keep charging / USB wires in the little drill compartment with its handy door, which I retained when I cut all the other stuff out of the case. That compartment doubles as the lid for the big opening for mounts.


I've been using this case for a couple years now, and it's been awesome knowing exactly where all your camera gear is. This organization makes it easy to prepare for your track day, too.

Untitled


I'm just posting in case this provides some ideas you can use. People throw this sort of thing out all the time.

Re-use!

Building a Quick Pot Rack. Plus: Railing Details

One of the projects that got put off for quite a while was a pot rack above the sink. We're spatially challenged when it comes to storage in the kitchen, and with a recent purchase of some proper wine glasses, something had to give.

That something was that the pot rack had to be built. Fortunately, this was a simple and easy project because my materials were already chosen and I've got lots of experience with them.

Here's the niche that will house the pots:

The design is a simple 1" black pipe between two floor flanges across the space. This follows the design of the other railings in the kitchen and stairwell areas, and it really ties the room together, Dude.

I already had a length of black pipe, threaded on one end. I took it in to Home Depot, where I had the other end cut to length and threaded. They didn't charge me for that, but the flanges for the ends were surprisingly expensive - almost $7 apiece. I don't remember them costing nearly that much last time. I also bought a packet of 8 #12x1" wood screws to fasten them to the cabinets for about $1.50.

I also happened to have some primer and a rattle can of "Hammered" finish black paint left over from the renovation. So all I had to do was clean the pipe with a wire wheel on the right-angle grinder, wipe it down with acetone, prime it, and paint it.

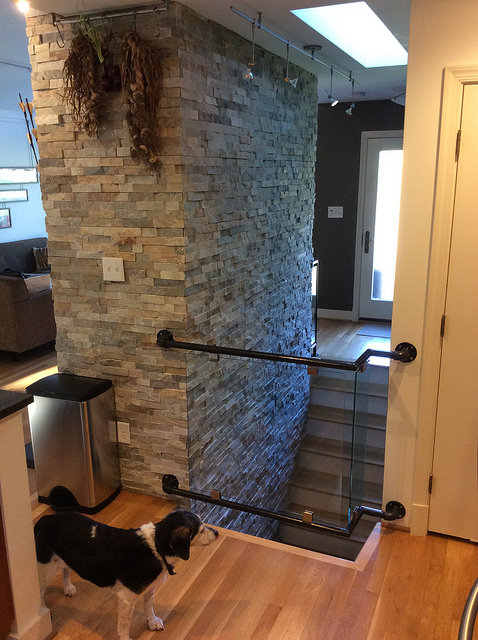
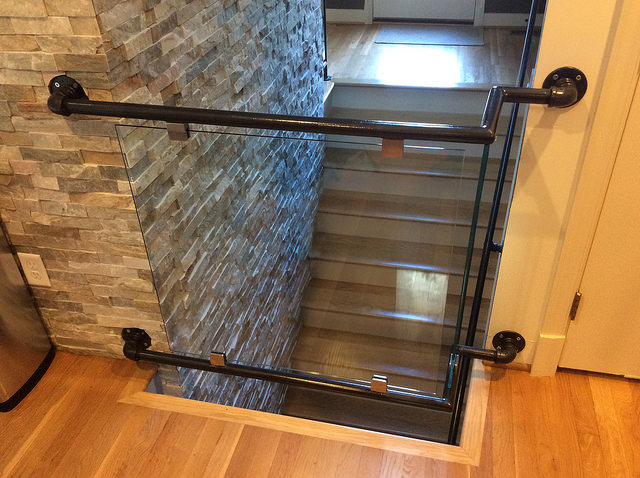
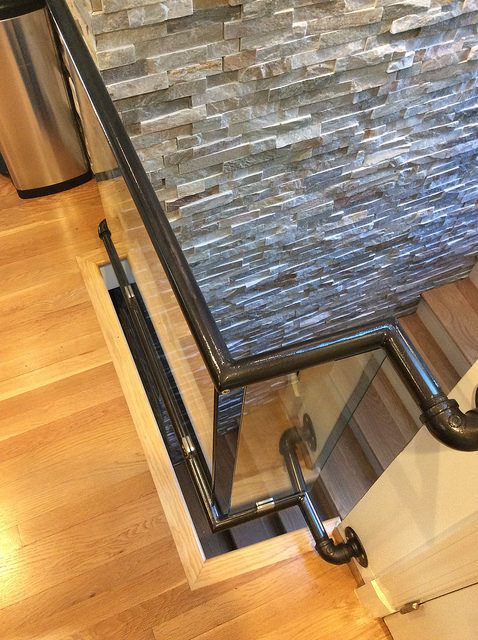
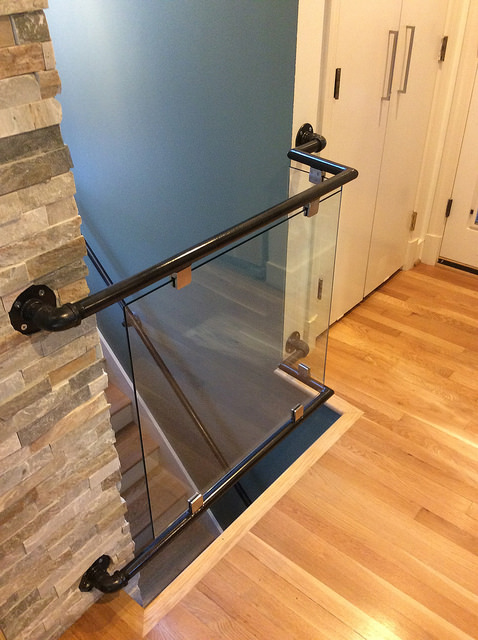
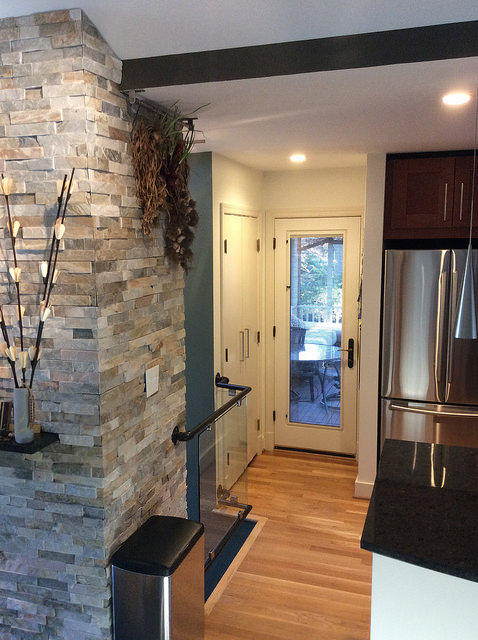
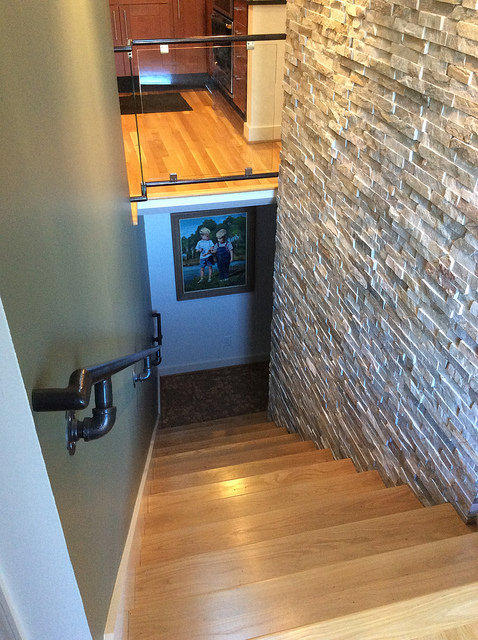
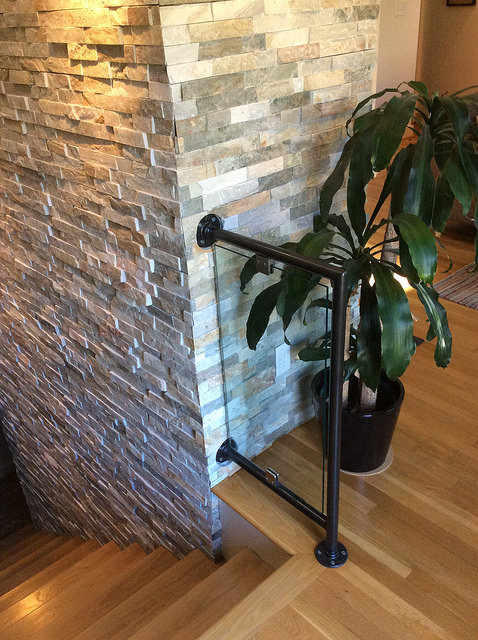
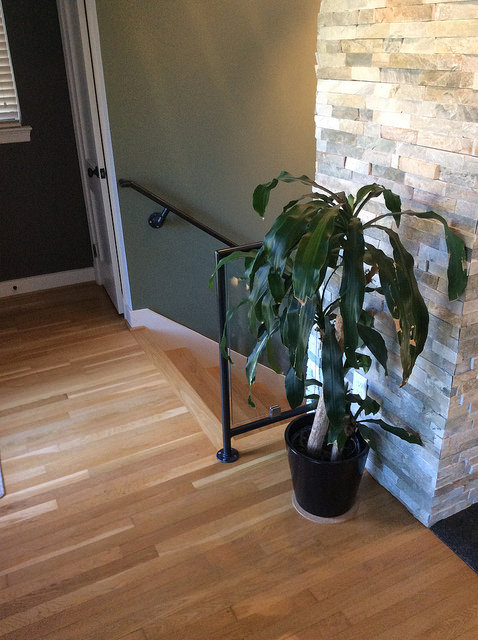
While I'm on the subject, I should share why this really ties the room together, Dude.  Earlier this week, I realized that I never took any pictures of the railings in the house after they were installed. So I took some pictures of the banister, the newel post, and the railing to show and tell.

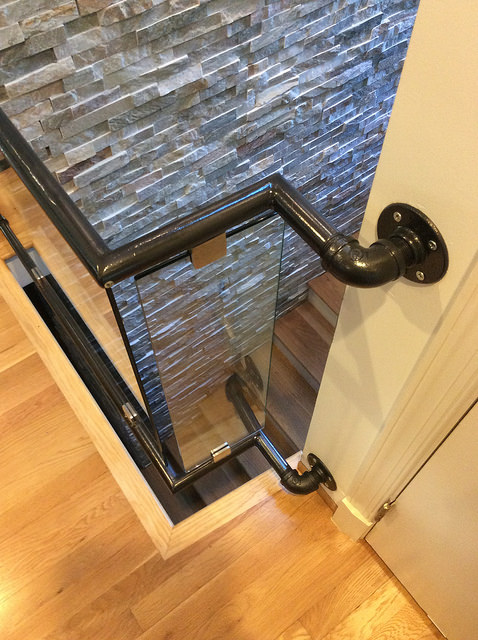
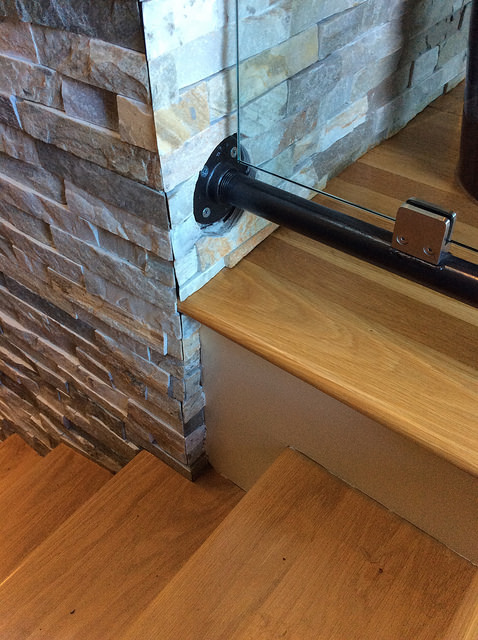
The railings are mostly threaded together with pipe-fittings at the wall to give it an industrial look, but to maintain a cleaner look, I welded the joints on the railing, the top corner of the newell, and the overlook bends. The overlook bends were tricky because they aren't 90 degree bends.

The railing is pushed out into the opening a bit for maximum space on the upper level since the entrance from the porch is rather narrow. The gaps between the bottom railings and the floor opening are less than 4", which passes the letter of the code, but the inspector didn't like it. Fortunately he let it go.

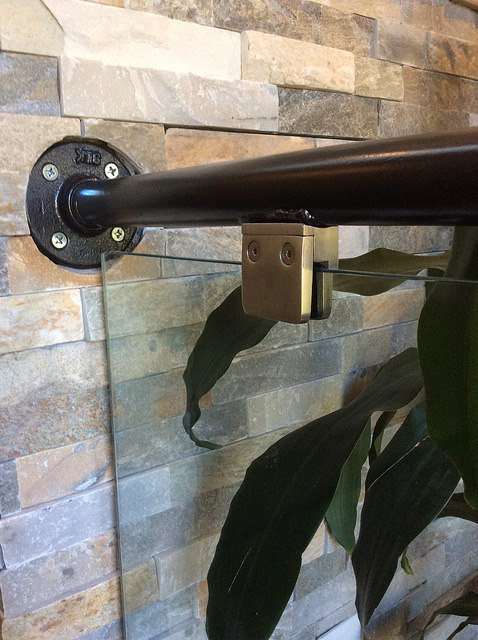
The glass was purchased from Consolidated Glass Corporation along with the other glass in the renovation. I bought the stainless steel glass clamp fittings directly from C.R. Laurence which is a fantastic resource for all kinds of hardware. I put some weld beads down where the glass clamps were mounted to build up the sides a bit. This is because the radius of the CRL hardware was larger than the radius of the pipe (the CRL hardware was designed for that big 3" radius stuff you see in hotels, I guess).

You can see it best in the picture of the top rail of the newel post.

I'd like to highlight some of the incredibly detailed planning and forethought that went into the railings and their placement.

I had the designs in mind very early in the process, and before the walls were covered up in stone or drywall, my excellent foreman Bill Machande was careful to ensure there was adequate blocking and support wherever the railings would likely attach.

For example, from a few pieces of scrap spacer plates that came with the steel support columns, I fabricated these standoffs for the newel post. They are anchored securely into the brick and then drilled and tapped with threads to hold the flanges. They aren't going anywhere, ever.

24046304982_5fc34e99b6_z.jpg

Both sides of the opening at the kitchen feature studs that face the drywall to give plenty of support to the overlook railings. Bill also made sure additional blocking was placed at predetermined points all the way down the staircase to support the stairway railing there. The railings should handle anything a parkour enthusiast might dish out.

My Porsche 944 Build Thread

I have begun my build thread over at Grassroots Motorsports. But I caution you, the build threads on that site are somewhat addictive. Don't visit on a school night or you could find yourself at 2am reading to find out what Burrito decided to do about the exhaust on his Fiat 128 Sedan.

I'll continue to post here about the joys of driving. I'll post there about the details you're not interested in. But if you are, then just go to my build thread at grassrootsmotorsports.com.

I did post there about my first track day in the Porsche at Summit Point main circuit. I'll say it here too, that was one of the most rewarding weekends I've had at the track.

The reason I post all the technical stuff at GRM is because the readership there is full of really talented car people. They have a lot to offer in terms of advice and ideas for just such a project. So I look forward to that sort of feedback there.

Turn 1 (I'll let all those other guys pass me before turn 3)

Turn 1 (I'll let all those other guys pass me before turn 3)

As I explain in the post on GRM, my Fiesta is actually faster around the track than the Porsche.

You read that right. Ford Fiesta > Porsche.

I'm hoping to change that situation eventually, through better driving, a stronger engine, and possibly lighter weight. The GRM crowd is full of help that way too.

Making Tire Caddys from Salvaged Medical Equipment

My neighbors are doctors, and they had a couple anesthesia machines that they intended to leave out for scrap. I thought the wheels on them might make perfect dollies for my new-to-me Porsche wheels and tires.

20150830_120957_HDR.jpg

The equipment was heavier than I expected, which was good, because those wheels really seemed to be built for the task. They also rolled really easily across asphalt, all the way from my neighbor's driveway to mine.

It took me a while to figure out how it was put together, but once I had one of them taken apart, I found that four nuts and a single cut of a metal brace would free my wheels from the whole apparatus:

I cut out some scrap plywood into circles to distribute the load on the tire. I wouldn't want to damage the sidewalls by storing them stacked four-high on four square inches of surface.

They roll around so nicely in my garage and driveway now. Way better than any Harbor Freight piece of crap could. I'm pretty happy with this little project. Eventually I'll attach the plywood to the cast aluminum frames with four carriage bolts, but for now they just sit on top. Which is what they do most of the time anyway!

Here they are in action, handily carrying the two sets of "phone dials". My garage is beginning to look like a Tire Rack warehouse.

Here they are in action, handily carrying the two sets of "phone dials". My garage is beginning to look like a Tire Rack warehouse.


Porsche 944: On The Road!

I love Maryland. Yeah, I said it. I work in Virginia, and there are actually people there who despise all things Maryland, to the point that they will not cross over the Potomac River without a good reason, whatever that might be.

Well, here in Maryland, we've got something called Historic tags. You pay just $51 for two years of registration, and you don't need to have the car inspected or pass emissions testing. As long as it's an occasional use car that's at least 20 years old, you can get them.

As a result, I was able to get tags for this car in 1 hour flat. I paid my sales tax on the car, a $100 title fee, and the $51 registration good for two years. On a really busy day at the MVA. I was impressed!

Someday I'll get some personalized ones that say something clever. But not until I'm more comfortable in our relationship. I want to see if this is real before I commit to something serious like that.

Purchased: 1988 Porsche 944 Track Car

I have been having a blast driving the Fiesta on the track this year, but the faster I get, the more I think it's important to have more appropriate safety gear. I'm approaching Spec Miata lap times in a car that has no roll cage, standard shoulder belts, and no rescue features like tow hooks or engine kill switches.

I've come to the realization that if I ball up the Fiesta, I'm down at least $20K, my daily driver, and not least, hospital bills. If I ball up a reasonably priced track car with track-appropriate safety equipment, then I'm out the reasonable cost of the car, I would likely walk away from the incident, and drive to work on Monday.

So my friend Mike said I should consider a Porsche 944. They're relatively inexpensive, easy to work on, and there are lots of them out there on the road and on the track. Eventually he sent me a link to one for sale, and I think it was the perfect thing for me. Yes, parts are still Porsche expensive. But at least I can do a great deal of the work myself without a lift, as opposed to just about any task you'd want to undertake on a Porsche 911.

So here it is: a 1988 Porsche 944 naturally aspirated coupe. It has been built up as a track car by a guy in Northeast Ohio. He had much of his work done for him by professionals, and I've got the receipts. Quite a lot of money has gone into this car. I bought it from a guy in Buffalo, NY, who had bought it for his wife in the hopes that she would take to track events. I guess she didn't take. So the car basically lived in a garage for a year before he got around to selling it.

Here it is on the trailer. I dragged it home from Buffalo, NY on August 23, 2015.

Here it is on the trailer. I dragged it home from Buffalo, NY on August 23, 2015.

The car has 87,500 miles. I was skeptical, but the CarFax report corroborated the number. It has been fairly heavily modified for the track, but it's still street legal. It had been safety inspected and registered in New York in 2014.

The good things:

  • Full bolt-in cage
  • Momo racing seats (expired for racing, but great for DE's)
  • 5-point cam-release harnesses (expired for racing, still ok for DE's)
  • A/C delete
  • Bigger brake swap from a 968
  • three sets of wheels (street tires you see, two sets of yellow phone dials with Nitto NT01 racing tires)
  • Momo steering wheel
  • 500# front springs
  • Kokeln front and rear anti-sway bars
  • Timing belt / balancer belt / water pump replacement within 5K miles
  • Aftermarket clutch
  • No oil leaks
  • No coolant leaks
  • No interior leaks
  • No rust
  • It drove up onto the trailer under its own power.
  • Everything seemed accurately represented in the advertisement. Many good things were actually left out!

The bad things:

  • It had been sitting a while. The condition of the fuel and fuel system was unknown.
  • The paint is in poor shape... the clearcoat came off with decal removal by the previous owner, and any forward-facing paint surfaces look like a starry sky from rock dings.
  • There was a missing bolt connecting the front driver-side lower control arm to the very fancy anti-sway bar end link.
  • It's a pain to get in and out of because I'm such a big lump.

So, not too many bad things, actually. That I've come across yet.

My plans for the car are to drive it at HPDE events (aka Track Days), and to drive it to and from HPDE events. I don't intend to modify it much further at this time. I bought it because it's ready to drive, and I hope to get some considerable quality track time with it before I would consider any mods.

944 N/A cars are known to be great handling, but on the slow side. That's ok with me. I'm looking forward to gaining a lot of RWD experience with this puppy, and I am not out there to break track records. In any case, it should be a lot of fun to drive on the track.

My Fiesta ST Mods

People always ask me at events, "What have you done to your car?" Well, it's kind of hard to explain in a short amount of time. I tend to rattle off the short version:

  • Wheels & Tires
  • Shocks
  • Drop-in K&N air filter
  • Seat harness (for autocross only)
  • Brake pads (for the track)
  • Brake ducts (for the track)

And that's about it.

But some of those mods were pretty involved, I've documented them pretty well on a couple websites. But it was hard to tell people how to find those links.

So it's really nice to be able to say, "just look on my website, www.dogparkracing.com!"

Autocross Build

My "2014 Fiesta ST G-Street Autocrosser" Build Thread on GrassrootsMotorsports.com.

- Includes wheels, tires, shocks, harness, graphics, and a trailer hitch.

Brake Ducts for the Track Build

My Brake Ducts Build on FiestaST.net.

Brake Pads for the Track

My Hawk StreetRace Brake Pad Review on FiestaST.net.

My Hawk DTC-60 Brake Pad Review on FiestaST.net.

Modifying the rear shock tower mount to accept a shock that was made for a VW Beetle.

Modifying the rear shock tower mount to accept a shock that was made for a VW Beetle.

I'll probably just do the rest of my mods here and link to them from other websites, unless I do a massive car project. I like doing the build threads on GRM because it's such a great resource. I get feedback from a lot of experienced gearheads.

VIDEO: Brake ducts installed at VIR!

Here's one of those videos that rely on just one viewpoint that's so amazing to watch that it doesn't take much to keep it interesting.

I have had a hard time keeping my Ford Fiesta ST in brakes during track events. The ST is hard on them, because it actually uses the brakes during acceleration out of a turn to keep the inside tire from spinning. It's called Torque Vectoring, or sometimes it's called an "e-diff". 

My hope was that keeping the brakes cooler would reduce the rate of wear, so I built some brake ducts. 

The ducts just provide some additional fresh air right to the hub area, where hopefully the rotors will pick it up and flow it through their cooling vanes.

The ducts just provide some additional fresh air right to the hub area, where hopefully the rotors will pick it up and flow it through their cooling vanes.

I put a camera down there to see what was going on with my design, and I was pleased to see that the system worked better than I could have imagined. The evidence is how quickly the red hot rotors go dark again.

but the video is even more interesting, just to watch everything mechanical going on.. The engine shifting, the suspension compressing, the tire stressing. It is pretty interesting to watch.

Under the car with a gopro to see whats going on down there.

Progress on the Chairs

IMG_0262.jpg

So we're moving along slowly on the chairs, but I thought I'd share some pics of the progress. To the left is a picture of one of the chairs in the condition it was purchased.


Ripping out the cording that was glued into the staple groove.

Ripping out the cording that was glued into the staple groove.

Ripping away the black naugahyde, removing the 1/8" hardboard back, and cleaning the channels of all staples and residue.

Ripping away the black naugahyde, removing the 1/8" hardboard back, and cleaning the channels of all staples and residue.

Since then, we've removed all the seats and backs. One chair is finished and upholstered. One is just about ready to be finished. One is in a dozen pieces being sanded, and the remaining three still await disassembly.

One of the chairs with the seat and back removed, but not yet disassembled. Note gaps in the side rails. This one is particularly rickety.

One of the chairs with the seat and back removed, but not yet disassembled. Note gaps in the side rails. This one is particularly rickety.

A chair that's been disassembled, sanded, glued up, and is ready for a light sanding and finish.

A chair that's been disassembled, sanded, glued up, and is ready for a light sanding and finish.

15842395634_0c7f8b9721_z.jpg
This is the only one that's done so far. This was the worst of the bunch, so it only gets better from here!

This is the only one that's done so far. This was the worst of the bunch, so it only gets better from here!

Finished product! (We've only got one done so far)

Finished product! (We've only got one done so far)

Mid-Century Modern Chair Refinishing

Our latest project is a set of mid-century modern dining chairs that we found at Habitat for Humanity's Silver Spring Re-Store. It's a brand new store with a lot of surplus, salvage, and antique building materials and furniture.

There was a sale happening that day, and we got them for 30% off, which resulted in six chairs costing about 70 bucks. Not bad, but when you consider that we spent more than four times that on all the materials, fabric, tools, and sandpaper, not to mention our time, they weren't all that cheap. But it is fun.

The chairs were in pretty poor shape. The finish was all rubbed off on the edges, and almost all of them were repaired poorly at some point in their lives. Most of them were wobbly too, requiring a rebuild.

The finish really cleaned up nicely, and we picked out a fairly simple, but definitely true to mid-century-modern style fabric to replace the black naugahyde upholstery. Most of the work has involved sanding, drilling, filling, gluing, and finally upholstering.

You can see how bad the previous repairs were in this picture. They used angle brackets (which were all broken in two),&nbsp;nasty glue, and hastily built-up dowels. Holes must have been drilled by hand, because everywhere they drilled a hole, they …

You can see how bad the previous repairs were in this picture. They used angle brackets (which were all broken in two), nasty glue, and hastily built-up dowels. Holes must have been drilled by hand, because everywhere they drilled a hole, they split the wood. Evidently they didn't use clamps. Anywhere.

On a couple of the chairs, they created new holes for long screws to try to strengthen the chairs. I removed that stuff and repaired the holes with plugs of walnut. The repairs really came out nicely.

These dining chairs were manufactured in Tampa, Florida by the Foster McDavid company, which evidently made furniture in the 50's and 60's. They are made of walnut, most likely. We broke them apart, repaired cracks, screw holes, and gouges, and sanded the entire finish off using 150 grit (trying to remove as little material as possible).

After re-assembling the chairs, we sanded them with 350 grit one last time and dusted them off with a tack rag. Then we applied Watco Danish Oil in the natural color.

Wow.

A few days later I applied a furniture wax, which made them look even better. The wood feels so silky.